
ExpressLRS WiFi Joystick
Connect an ExpressLRS radio to HeliSense over WiFi.
What it is
Many ExpressLRS transmitter modules and radios can present themselves as a WiFi joystick, sending your stick input to a computer or device over the network. HeliSense reads that input for the Trainer and Simulator.
You’ll need
- An ExpressLRS-based radio or TX module that supports WiFi joystick output.
- Your device and the radio on the same network.
How it connects
Your device running HeliSense reaches the transmitter in one of two ways:
- Straight to the transmitter. When ExpressLRS WiFi is in access point (AP) mode it advertises a network of its own, and you join your device to that.
- Over a separate local network — your home network, say — with the transmitter and your device both on it.
If your device and the transmitter are already on the same network, or are set up to join it, skip ahead to turning it on in HeliSense.
Choosing a model
On the transmitter, select a model that you fly your real helicopters with. The switches you already use for motor and throttle control and for flight modes then carry across to HeliSense as they are.
Turning WiFi on at the transmitter
This is done from the ExpressLRS app on the radio — the Lua script, on radios that call it that.
-
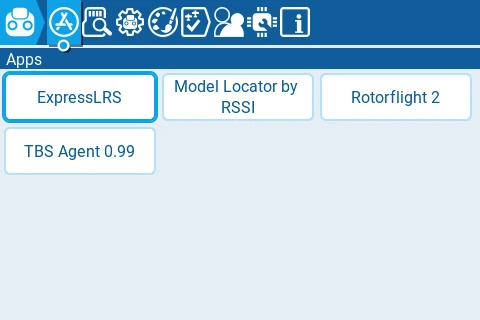
Open the ExpressLRS app
From the radio’s Apps list, choose ExpressLRS.
-
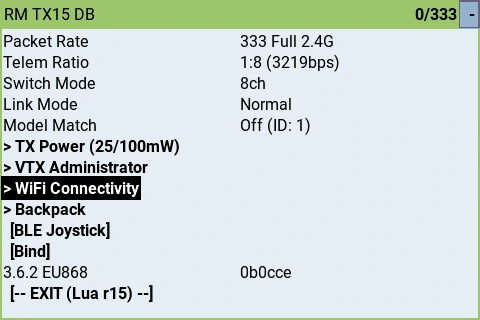
Go to WiFi Connectivity
Scroll down past the link settings to WiFi Connectivity and select it.
-
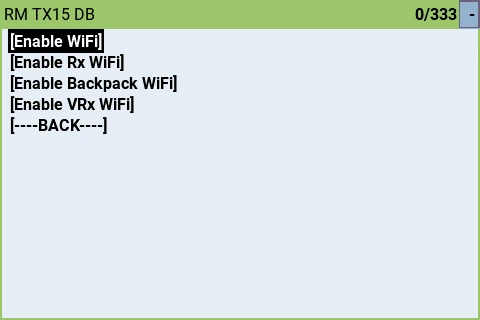
Choose Enable WiFi
Pick the first entry, [Enable WiFi]. The others on this screen turn on WiFi for a receiver, a backpack or a video receiver instead — it is the transmitter’s own WiFi you want.
-
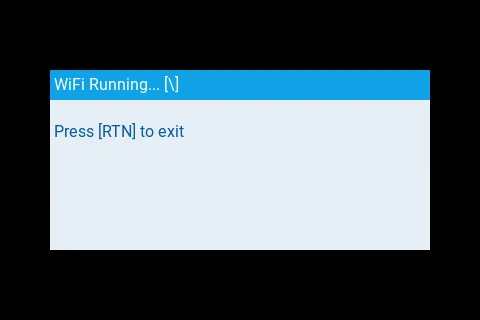
Check it is running
The radio shows WiFi Running… — that is the transmitter’s WiFi up and ready for HeliSense to find.
Setting the transmitter’s network
The first time you enable WiFi the transmitter has no network of its own to join, so it comes up in access point mode and advertises one instead. From there you have two options.
Fly on the transmitter’s own network
Join your iPhone, iPad or Mac to the network the transmitter is advertising:
- Network name: ExpressLRS TX
- Password: expresslrs
That is the whole setup. There is no router involved, so it works anywhere — at home, at the field, or in a hotel room. The trade is that your device is off your usual network while you fly, and so has no internet connection over WiFi.
Put the transmitter on your own network
If you would rather leave your device on your home network, join the ExpressLRS TX network as above and then open http://elrs_tx.local in a browser. The ExpressLRS web interface lets you hand the transmitter your own network’s name and password, and it joins that network whenever you enable WiFi from then on.
Turning it on in HeliSense
With the transmitter’s WiFi up and your device on the same network, all that is left is to switch the input on — HeliSense finds the transmitter itself. Only the way you reach the switch differs between the two platforms.
On iPhone and iPad
Open Settings from the gear on the home screen, tap ExpressLRS WiFi Joystick and switch it on.
On Mac
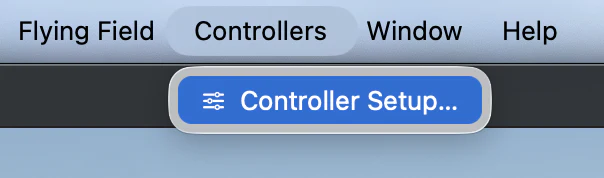
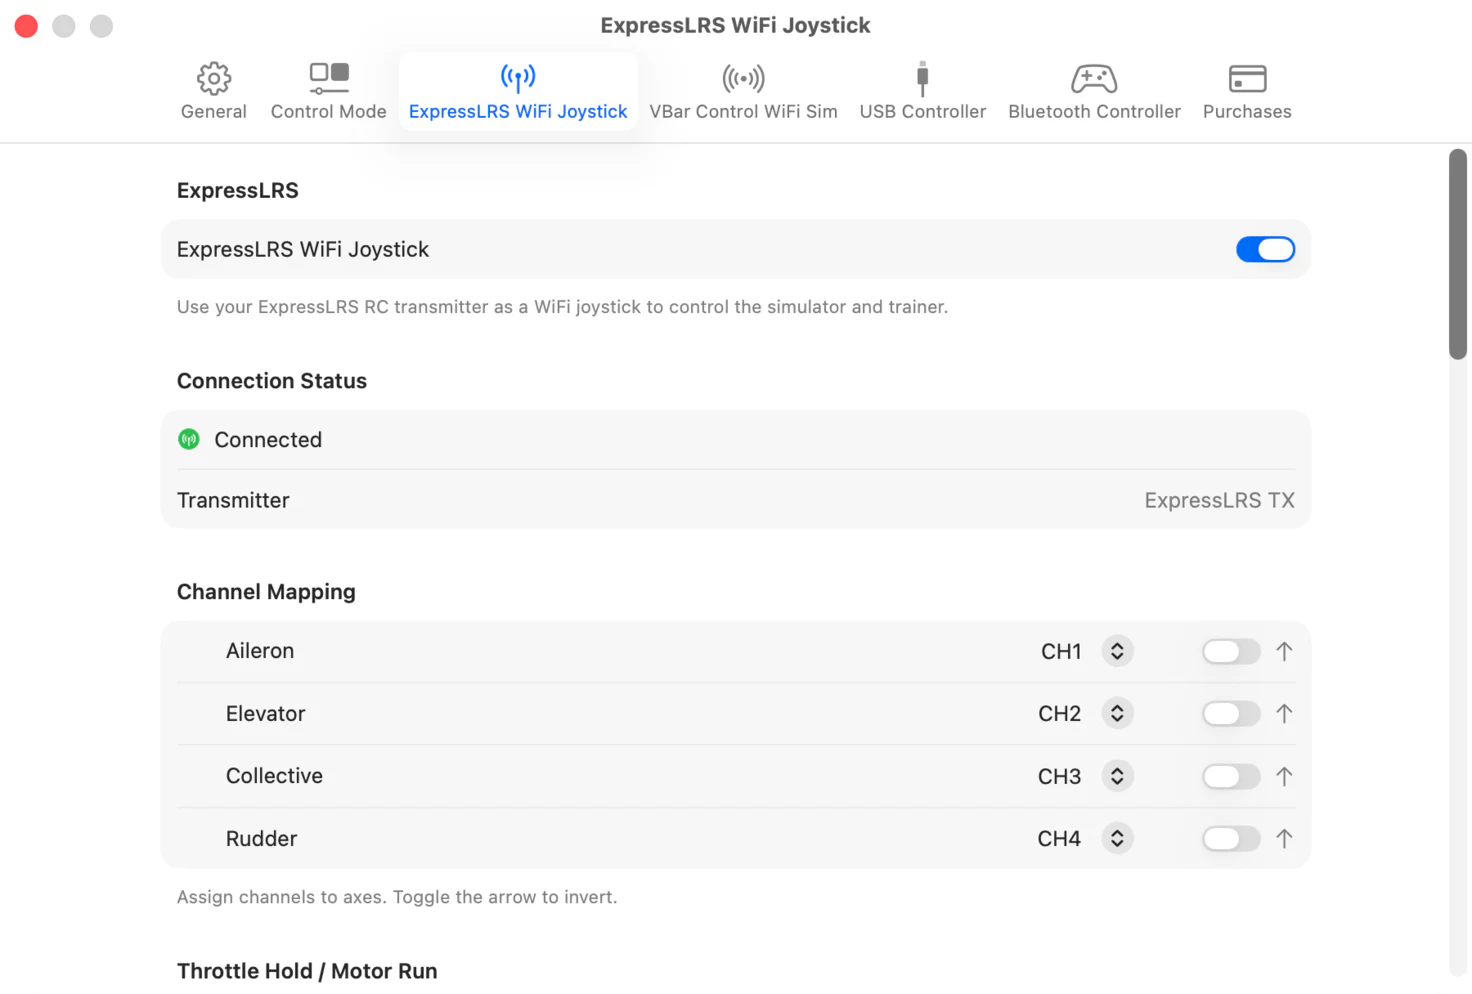
From the menu bar choose Controllers › Controller Setup…, open the ExpressLRS WiFi Joystick tab and turn it on.
Connection Status is your confirmation that the link is live: it reads Connected and names the transmitter it has found.
If it doesn’t connect
Nearly always this is the network rather than the radio or the app. Work through these in order.
-
Check both are on the same network
If the transmitter is in access point mode, check your device is still joined to the ExpressLRS TX network rather than having gone back to a remembered one.
If instead you have put the transmitter on your home network, confirm both it and the device running HeliSense are connected to that network — and to the same one, rather than, say, the transmitter on a guest network and the phone on the main one. Keep the transmitter near the router or access point, and the same for the Apple device if it is on WiFi.
-
On a wired Mac, check the subnet
If your Mac is on an ethernet cable, check that it has an IP address in the same subnet as the transmitter. On a home network you will have to look this up through your router.
On a simple home network — a router supplied by your internet provider, with no advanced configuration — it is highly likely that both devices are on the same subnet. On a corporate or hotel network you will not be able to check, and the two are likely to be on different subnets: go to step 4.
-
Restart the link, then the WiFi, then the radio
Turn ExpressLRS WiFi Joystick off in HeliSense and back on.
If that does not do it, disable and re-enable WiFi at the transmitter — back through the ExpressLRS app, as in turning WiFi on above. If it still will not connect, switch the radio off and on again.
Should none of that help, that points to a configuration or performance problem with the network itself. One thing left to try is the hotspot on your phone: if HeliSense is on the phone, put the transmitter on the phone’s hotspot; if HeliSense is on an iPad or Mac, connect that to the hotspot as well.
Your device and the radio may consume mobile data while they are on the hotspot. The stick data itself travels between them locally and does not. -
Take the network out of it
If the two are on different subnets, or nothing above has worked, go back to access point mode and connect your device straight to the ExpressLRS TX network. That removes the router, the subnets and the rest of the network from the picture entirely, which is why it is worth trying even if you would rather not fly that way permanently.
Assigning channels
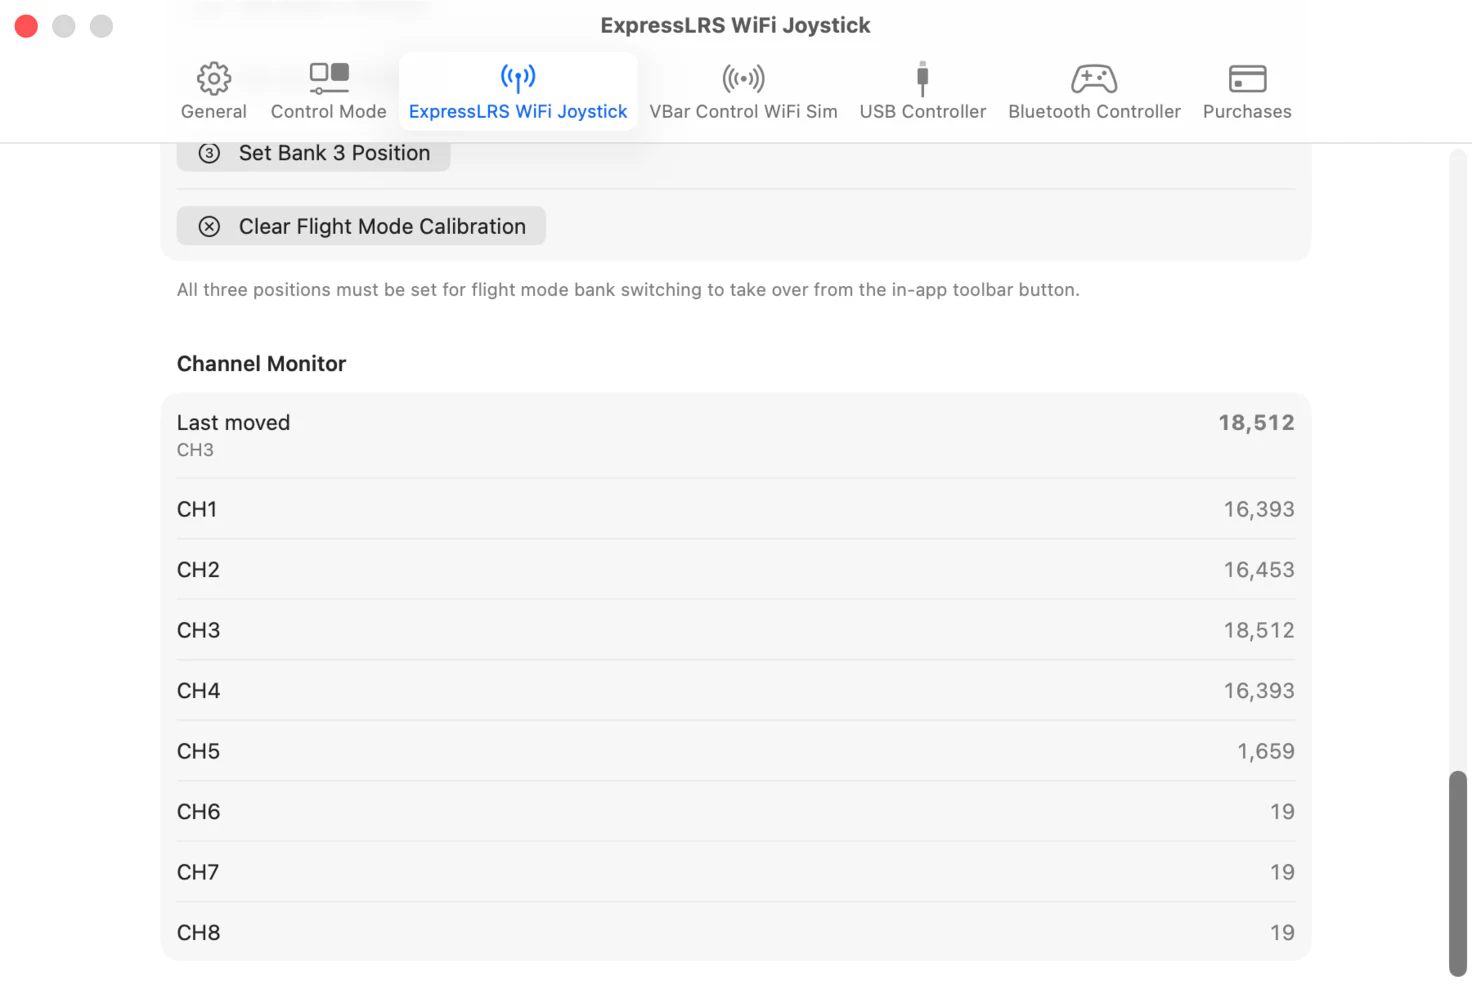
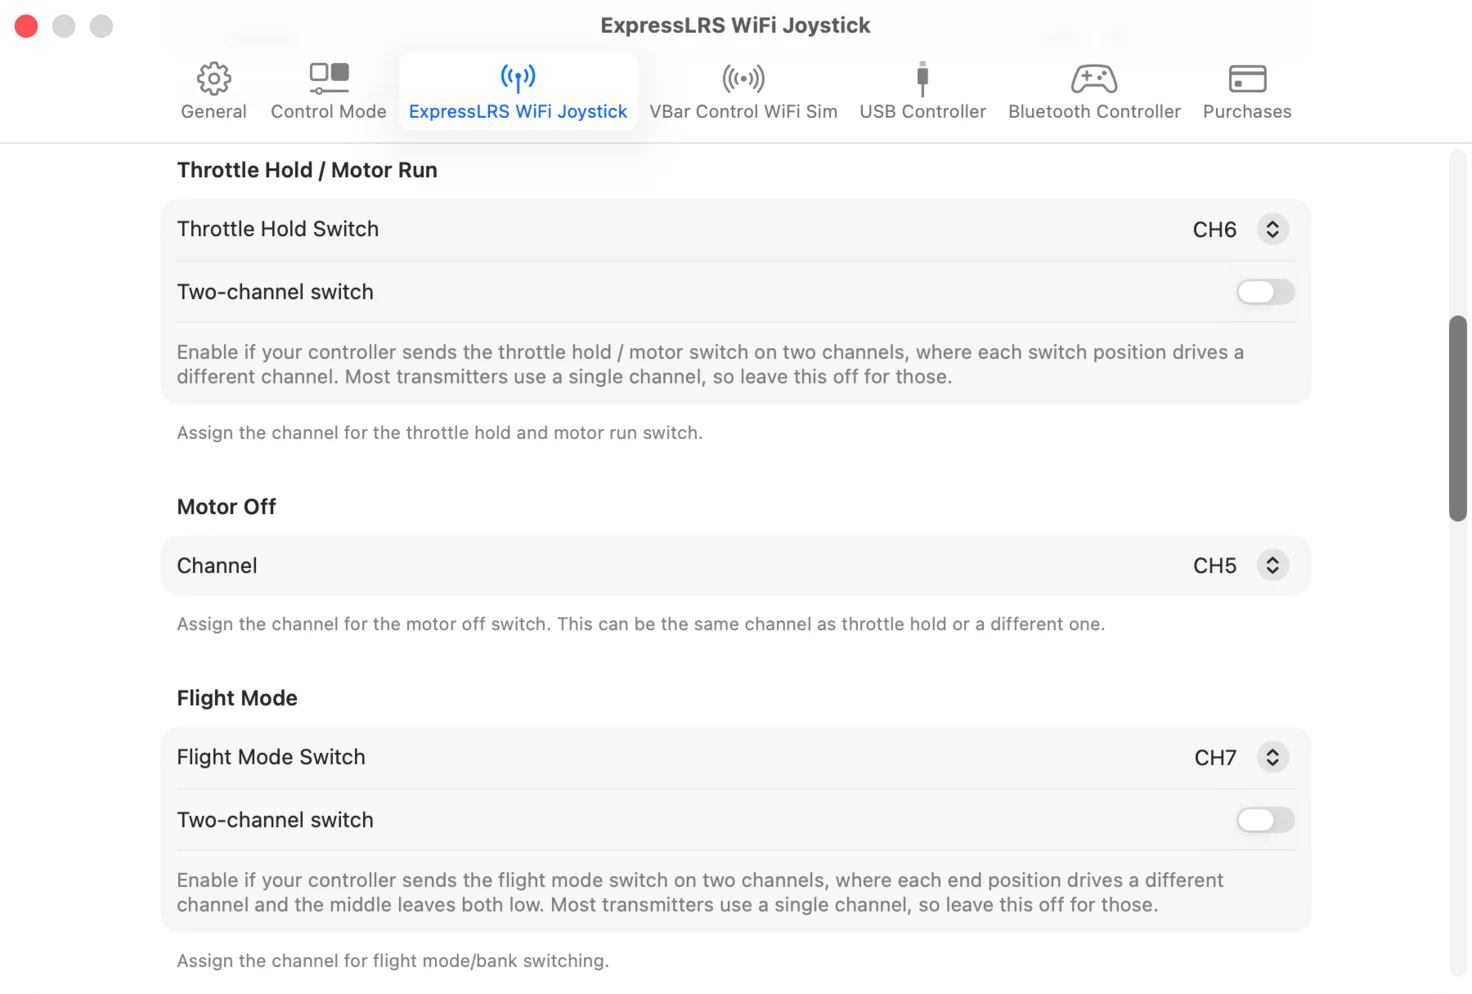
HeliSense starts from a default channel assignment. If that does not match your transmitter, you can change which channel drives each control axis and each switch. The screenshots below are the Mac window; the same sections appear under Settings › ExpressLRS WiFi Joystick on iPhone and iPad.
-
Find your channel numbers
Start with the Channel Monitor, at the bottom of the panel. Move each stick in turn and note which channel responds — the channel that moved last pins to the top of the list, so you do not have to watch the whole table. Do the same for the switches you use for motor control and flight modes.
-
Map the control axes
In Channel Mapping, use the picker on each row to choose the channel for that axis. The toggle at the end of the row reverses the axis if it moves the wrong way.
-
Map the switches
Then assign the channels for Throttle Hold / Motor Run, Motor Off and Flight Mode. One switch can cover motor control on its own, or you can put Motor Off on a separate one.
-
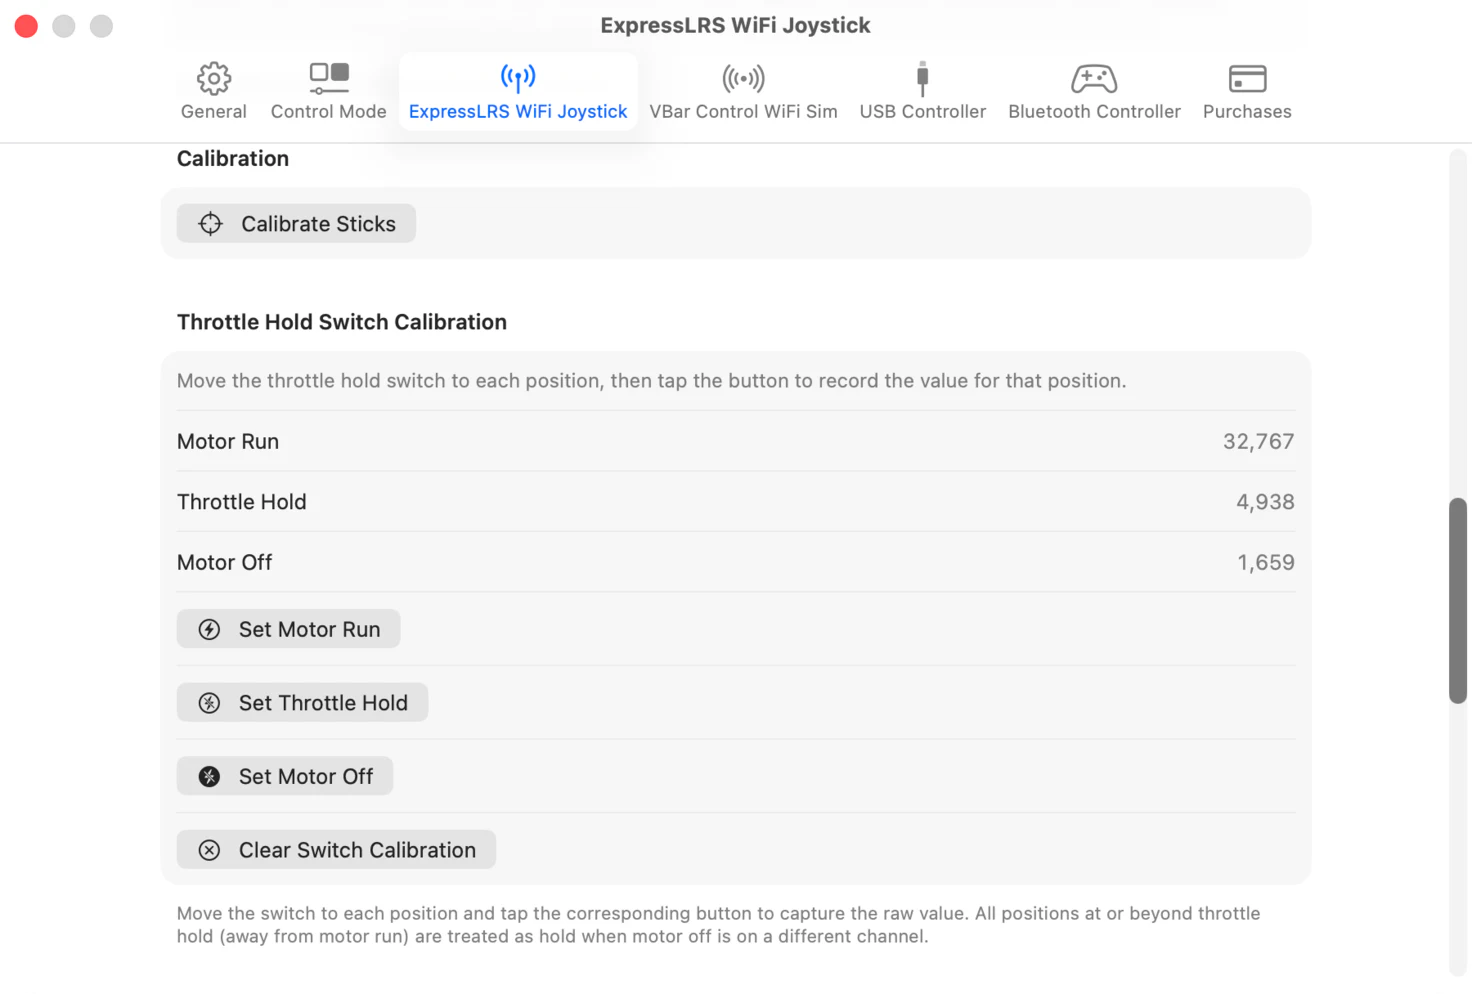
Calibrate the sticks and the throttle hold switch
Click Calibrate Sticks and follow the instructions on screen.
For Throttle Hold Switch Calibration, move the switch — or switches — to each of the positions listed and click the matching button for that position.
-
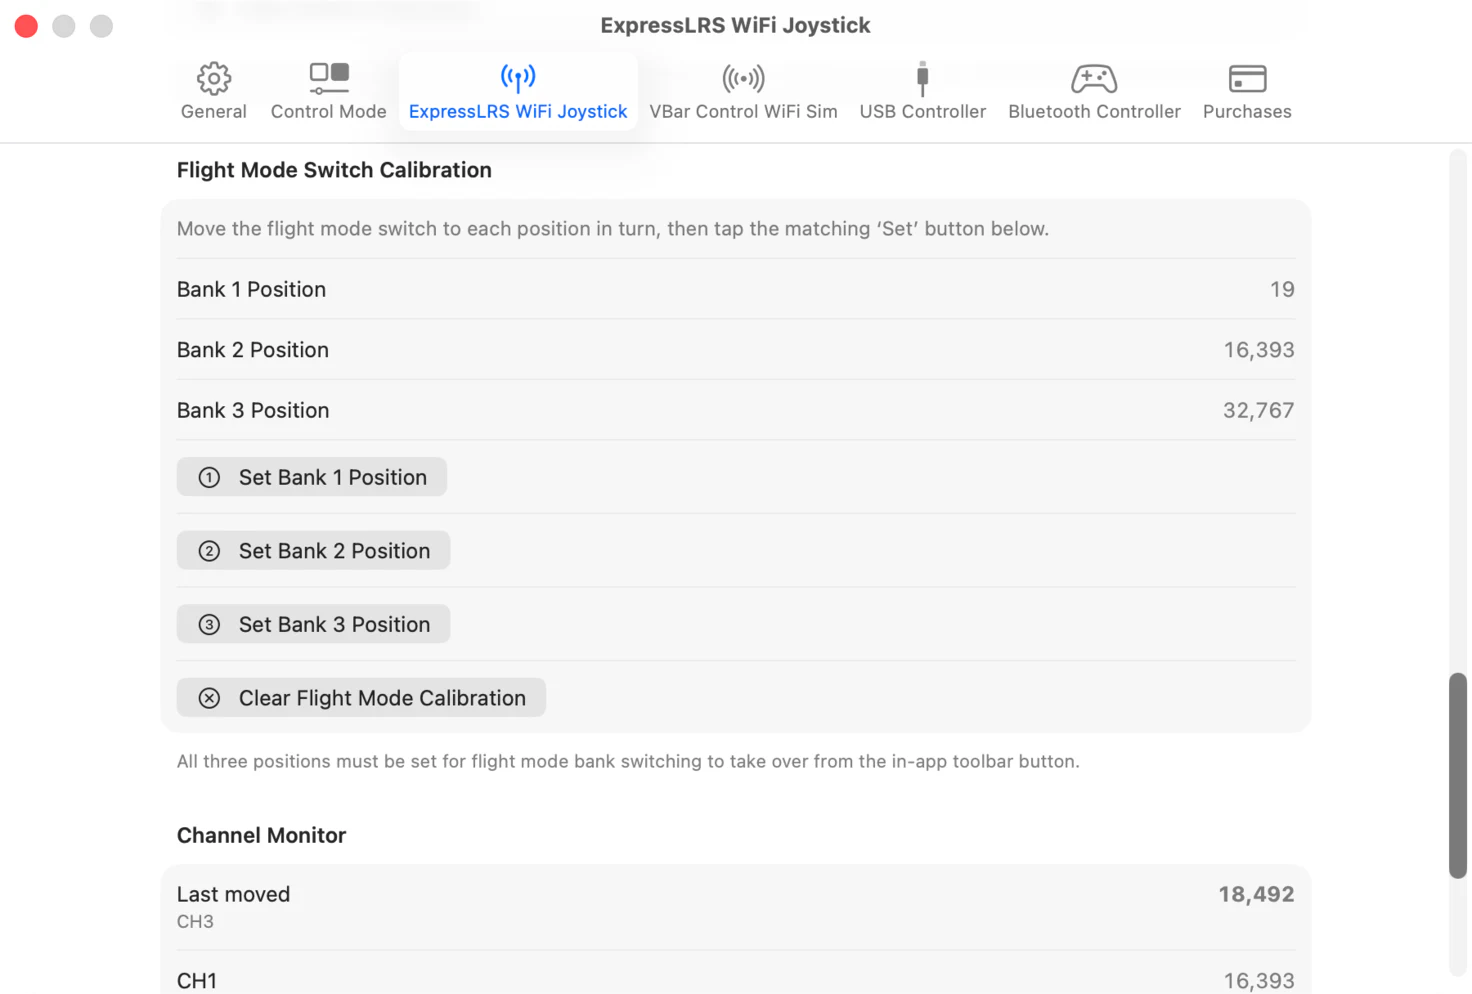
Calibrate the flight mode switch
Set the switch to the bank 1 position and click Set Bank 1 Position. Do the same for the other one or two positions, depending on whether you use a two- or three-position switch.
Prefer a different setup? See the full list of controllers.