Bluetooth game controller
Fly HeliSense with a game controller paired over Bluetooth.
What it is
HeliSense reads Bluetooth game controllers through Apple’s built-in game-controller support, on iPhone, iPad and Mac. There is nothing to install and nothing to map: pair the controller with your device and its sticks fly the helicopter. Two buttons can be assigned as well — one for throttle hold, one for flight mode.
You’ll need
- A Bluetooth game controller your device recognises as one.
- An iPhone, iPad or Mac running iOS 26 / macOS 26 or later.
Which controllers work
HeliSense does not keep a list of its own — it reads whatever your iPhone, iPad or Mac already treats as a game controller. That falls into two groups.
Console controllers
Apple supports several of these directly, and they need no certification for Apple devices:
- Microsoft’s Xbox Wireless Controller, including the Elite Series 2 and the Xbox Adaptive Controller.
- Sony’s DualShock 4 and DualSense.
- Nintendo’s Switch Pro Controller.
It has to be a Bluetooth model. The original Xbox One controller has no Bluetooth radio in it, for one, and cannot pair with an Apple device at all.
MFi-certified controllers
These are made for Apple devices and sold as such, carrying the Made for iPhone / iPad mark. Clip-on pads that hold the phone between two halves are the common shape, and there are standalone ones too.
Pairing the controller
Pairing happens in your device’s own settings rather than in HeliSense, and only has to be done once.
- Put the controller into pairing mode. Follow its own instructions — usually holding a button until a light flashes.
- On iPhone or iPad, open Settings › Bluetooth. On Mac, open System Settings › Bluetooth. The controller appears in the list of nearby devices; select it to connect.
Your device remembers it after that, so switching the controller on is enough next time.
Setting it up in HeliSense
The sticks fly the helicopter as soon as the controller is connected. The Bluetooth Controller screen is where you confirm HeliSense has found it and put throttle hold and flight mode on buttons. Only the way you reach that screen differs between the two platforms.
On iPhone and iPad
Open Settings from the gear on the home screen, then tap Bluetooth Controller under Controller.
On Mac
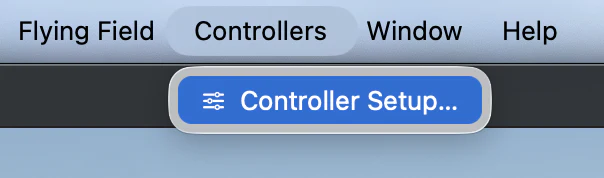
From the menu bar choose Controllers › Controller Setup…, then open the Bluetooth Controller tab.
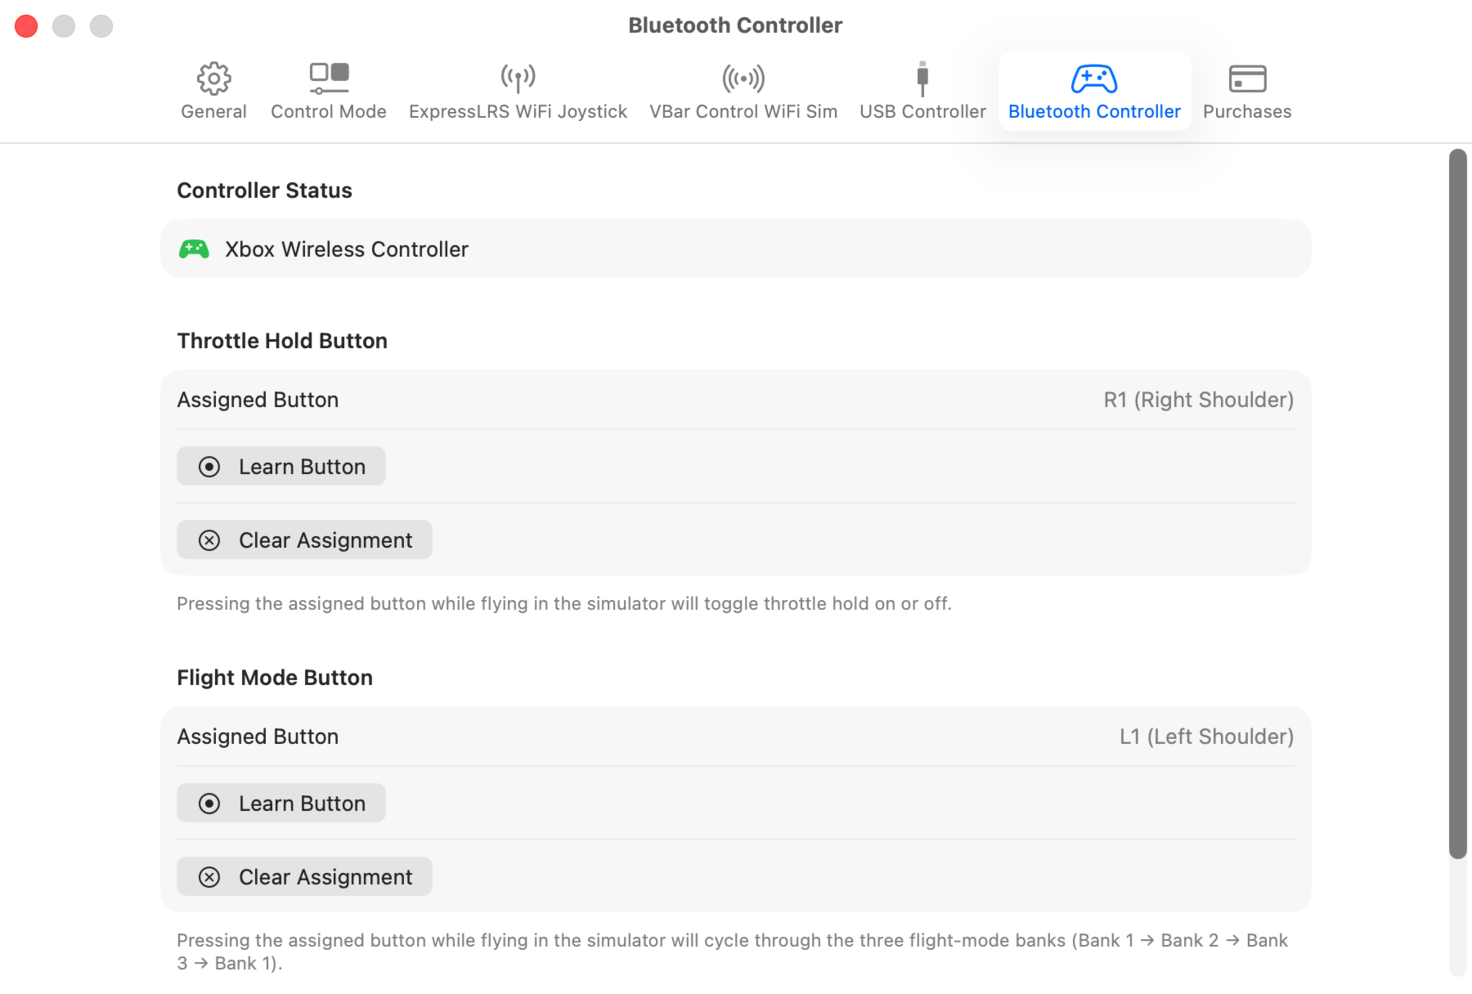
The tab carries the same three sections as the iPhone screen: Controller Status, which names the controller HeliSense is reading, and a Throttle Hold Button and Flight Mode Button below it.
Assigning the buttons
Two functions can be put on controller buttons, and both are learned the same way — HeliSense watches for a press rather than asking you to pick from a list.
-
Choose Learn Button
Under Throttle Hold Button, select Learn Button. HeliSense waits, showing Press any button on the controller… with a Cancel beside it.
-
Press the button you want
Press it on the controller. HeliSense records it and names it next to Assigned Button — R1 (Right Shoulder) in the video above.
-
Do the same for flight mode
Under Flight Mode Button, select Learn Button again and press a different button. The video uses L1 (Left Shoulder).
To move a function to another button later, run Learn Button again. Clear Assignment takes it off the controller altogether.
What the two do while you are flying in the Simulator:
- Throttle hold toggles on and off with each press.
- Flight mode cycles through the three banks — Bank 1 to Bank 2 to Bank 3, and back to Bank 1.
Worth knowing
Control Mode is a separate setting
Which stick carries what is set by Control Mode, higher up the same Settings screen — Mode 2 puts rudder and collective on the left stick and cyclic on the right. Set it to the mode you fly.
There is no stick calibration
HeliSense does not ask you to calibrate a Bluetooth controller the way it does a transmitter. Apple normalises the axis values before they reach the app, so the sticks are ready as they are.
It still isn’t a transmitter
A game controller’s sticks are short, and both of them spring back to centre — the collective stick on a transmitter does not. It works well for practising in the Trainer and having some fun in the Simulator. If a transmitter is available to you, connecting it over WiFi or USB gets you the closest feel to flying a real RC helicopter.
Prefer a different setup? See the full list of controllers.